How do I set up BigQuery?
If you’re not sure what the deal is with BigQuery, you can read our quick guide here. But in short, it’s an enormous database that is an extremely effective solution for handling large datasets without needing to worry about storage and compute time. It’s a well integrated method of storing your Google Analytics data that provides flexibility, control and easy access.
So how do you get BigQuery set up properly?
Project & Billing
Before linking BigQuery to GA4, a Google Cloud project needs to be created:
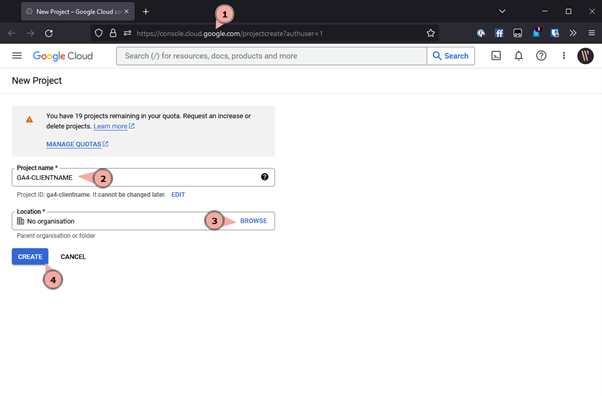
1. Head to https://console.cloud.google.com/projectcreate (ensuring the correct account is logged in).
2. Define a useful name for the project, such as “GA4-BRANDNAME”, replacing “brandname” as appropriate.
3. If part of an organization, be sure to add the project to the business Org.
4. Click “Create” at the bottom of the form.
The new project will now be created, which can take a few seconds to process.

5. Click the “Select project” button on the top right-hand-side to make the newly created project active.
If the paid tier of BigQuery is required, billing must also be set up – this will apply to all Google Cloud projects owned by the current user.
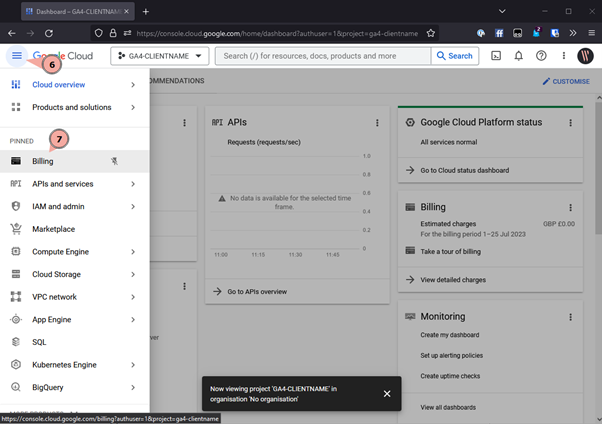
6. Click the main navigation on the top left-hand-side.
7. Click the “Billing” option (which may be hidden under the “More products” section at the bottom of the main navigation.

8. Click “Add billing” and follow the billing prompts to add a payment method.
Once added, head back to the “Billings” page, where you are able to define budget alerts:

9. Clicking “Setup a budget alert” within the new billing account.
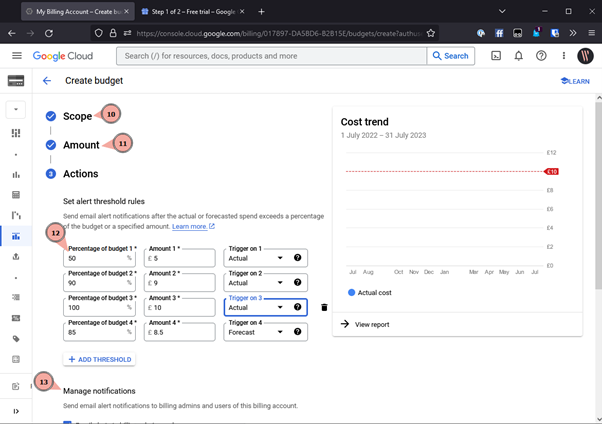
10. Define a name, time range and projects the alert should apply to.
11. Set a maximum target amount to monitor and set thresholds against.
12. Define the different percentages of budget that will trigger alerts as either a forecast or actual budget amount.
13. Then finally determine where those alerts should go, typically we advise using email.
Enabling the BigQuery API
Now the project has been created, the BigQuery API needs to be allowed to operate within the project. To enable this, do the following:
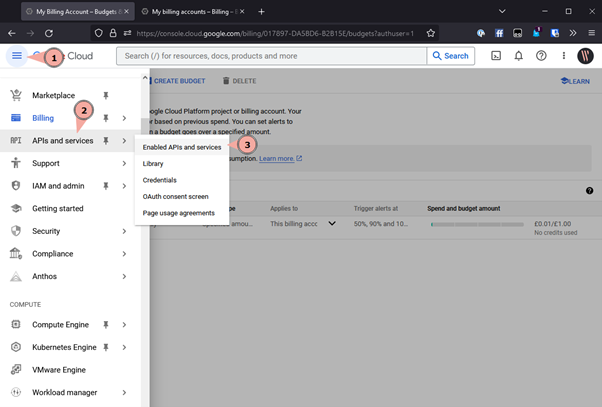
1. Click back on the main navigation.
2. Hover over the “APIs and services”.
3. Click on the “Enabled APIs and services” option.
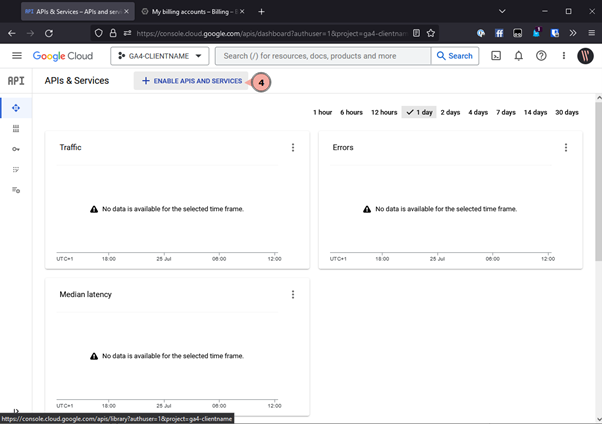
4. Within the API dashboard click to “+ Enable APIs and services” on the top bar.
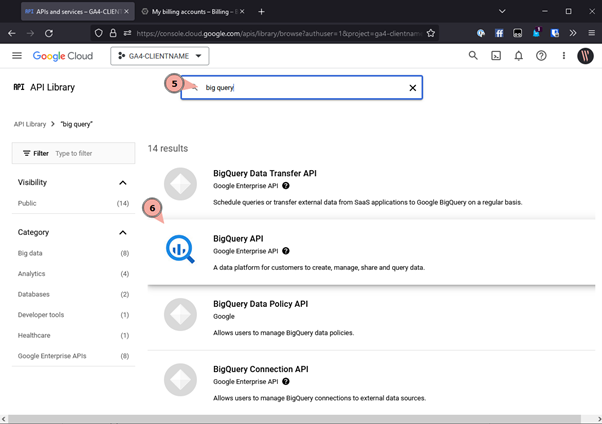
5. Search for “BigQuery”.
6. Select the “BigQuery API” option.
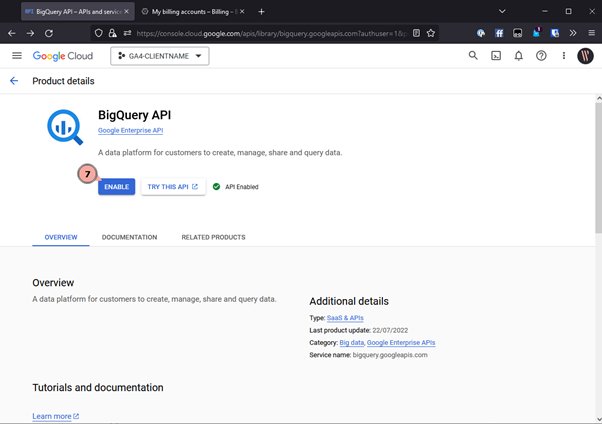
7. Finally, enable the API with the “Enable” button, accepting the terms and conditions if prompted. If this button reads “Manage” the API has already been enabled for the project.
Linking the BigQuery project in GA4
The final step is to link the newly created project with a specific Google Analytics 4 property:
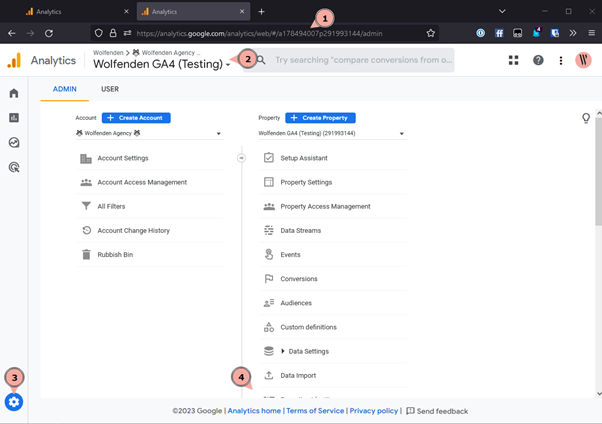
1. Head to https://analytics.google.com/analytics/web/
2. Select the appropriate GA4 property from the account selector on the top left-hand-side.
3. Click on the admin cog on the bottom left-hand-side.
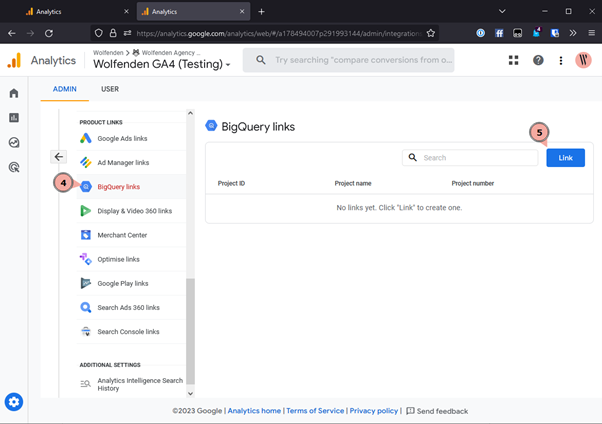
4. Scrolling down on the “Property” column will show a “BigQuery link” option.
5. A new link will need to be created, so click the “Link” button on the top right-hand-side.
The final step controls what data we’re storing in BigQuery and how we’re storing that data:
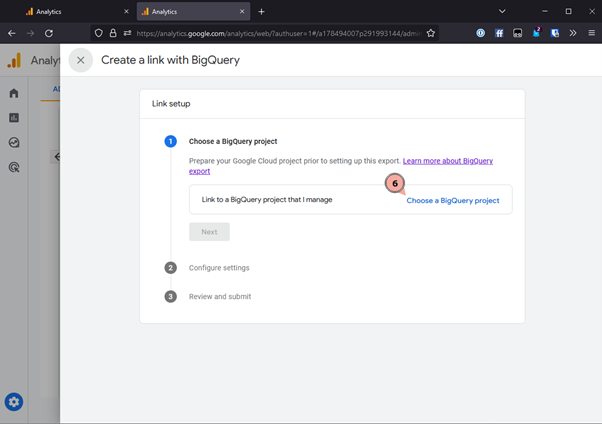
6. Click the “Choose a BigQuery project” link and select the newly created Google Cloud project from the above steps, saving this with the “Confirm” button.
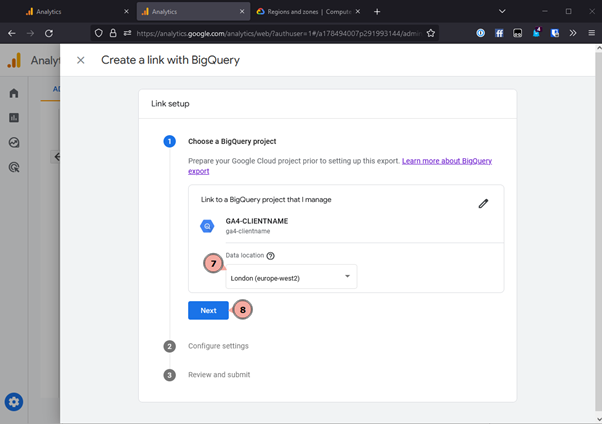
7. Importantly the data housing region needs to be chosen, for the UK something like “Europe-west2” would be most suitable. Other regions can be identified in the Region and zones documentation.
8. Save this choice once decided.
This can be changed in future, but the process is manual so be sure to double check the region before saving.
Depending on whether a billing method was set up in the earlier steps, some of the following options might not be available:
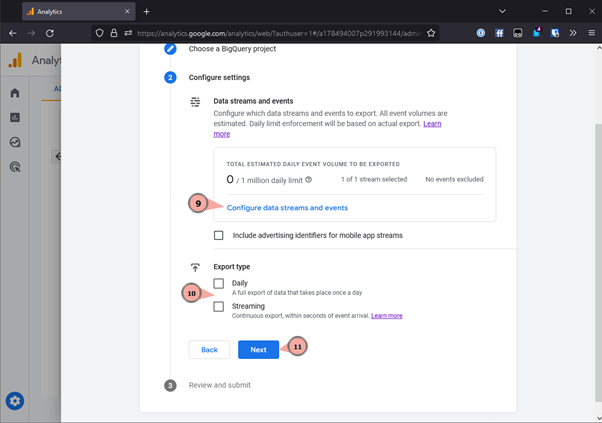
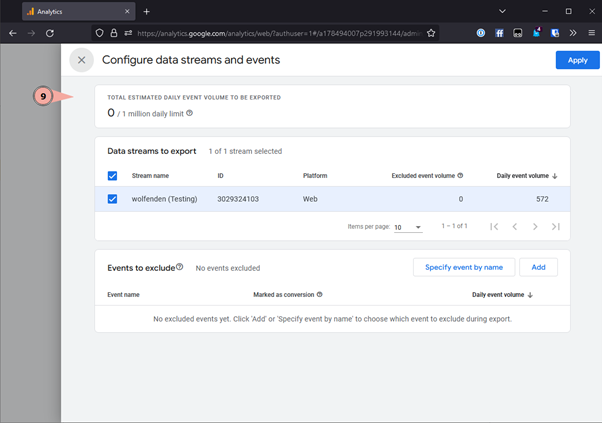
9. If desired a sub-set of data can be recorded in BigQuery, either choosing only certain data streams or choosing specific events to exclude. Typically we advise allowing all data, thus we recommend leaving this as default.
10. If no billing has been added or you would like just the free tier, choose the “Daily” export type. If billing has been added, and intra-day is of use, choose the “Streaming” export type.
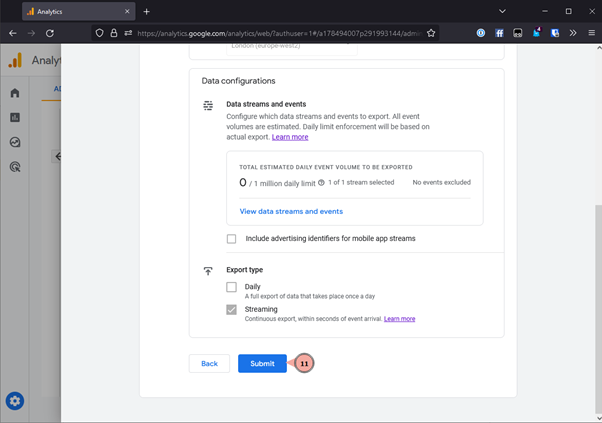
11. Click “Next” for one final review of the chosen settings.
12. Review these settings and click “Submit” once ready.
Data will now begin populating in the new Google Cloud project, and depending on the stream settings, will be available almost immediately or within 24 hours.
If you need any support with setting up and linking your BigQuery account, make sure to reach out today and we can help ensure that everything is enabled correctly.
Latest Insights From The Team.
Explore our team’s latest thoughts and actionable advice from our blog to support your digital marketing strategies.