Your complete guide to tracking email and phone clicks in GA4 with Google Tag Manager
Tracking clicks for email and phone enquiries is a little different in GA4 thank it used to be for Universal Analytics. In the below guide, I’m going to take you through how to set up email and phone click tracking in GA4 using Google Tag Manager, allowing you to accurately measure these key success metrics.
Setting this up using Google Tag Manager means that you don’t require developer support, and means that you can leverage it to capture data for other platforms (e.g. Google Ads, Meta Ads, Microsoft Ads) keeping all of your tracking and data in one place.
There are two parts to this guide; Google Tag Manager (GTM) configuration and Google Analytics 4 (GA4) Conversion and Custom Dimension Configuration.
Please note; this tracks when a user has clicked on a telephone or email link with the intent to get in touch, not whether the user actually called or sent an email.
Part 1: Enquiry Tracking: GTM Configuration
There are two methods to use to implement this tracking with Google Tag Manager. Method one includes downloading a Google Tag Manager recipe that Wolfenden has created and upload it to your own GTM container. Method 2 is a manual process and we have included a step-by-step guide on doing this yourself.
Method 1 – Google Tag Manager Recipe Upload
Download the Google Tag Manager Recipe below:
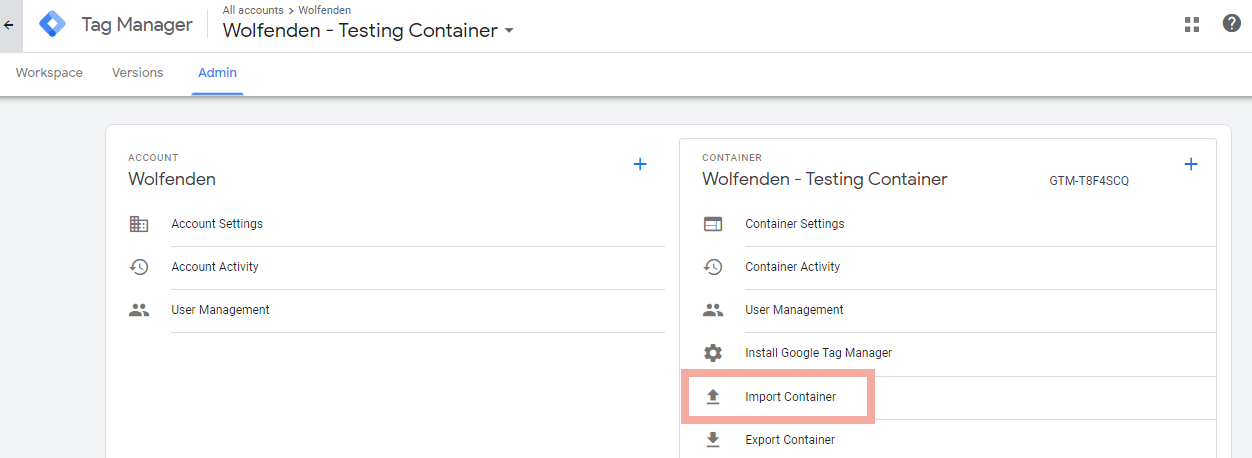
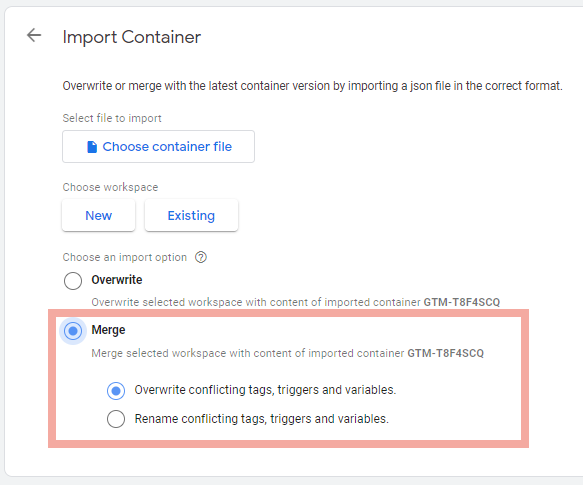
In Google Tag Manager, go to Admin > Import Container and upload your container file. Choose Merge – there should be no conflicts.
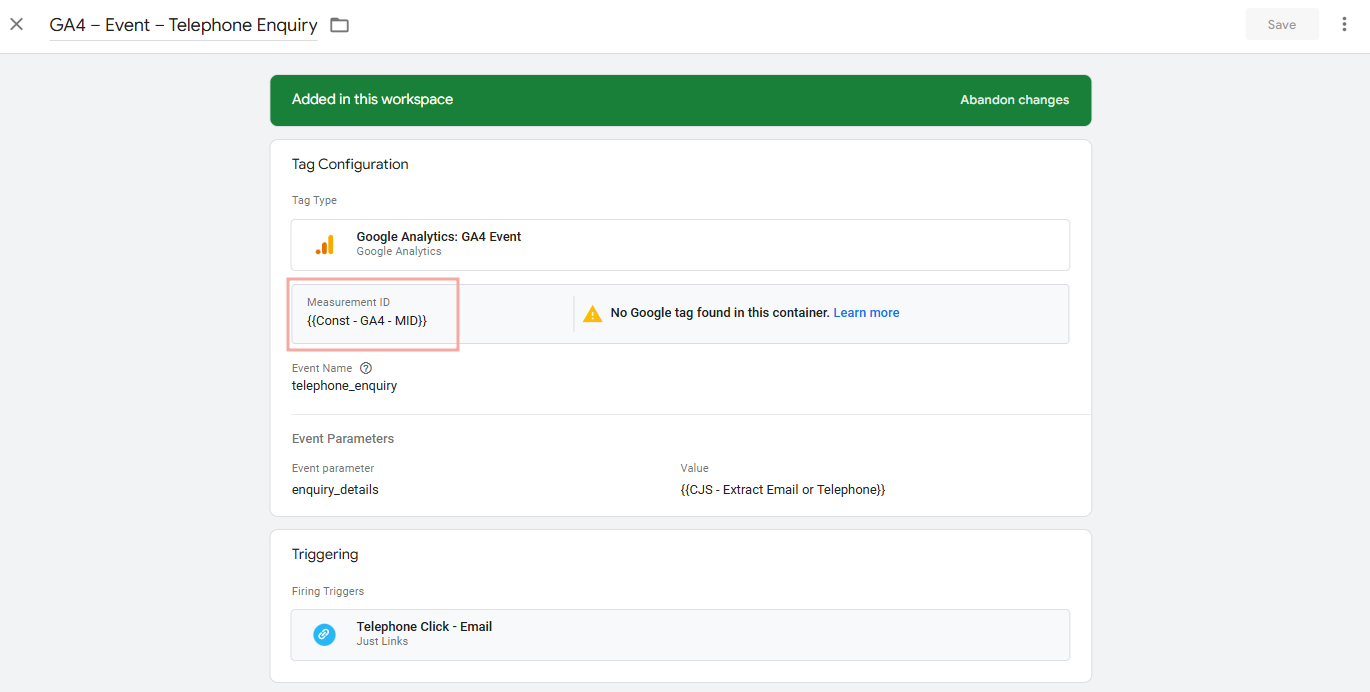
There are two new tags that need amending – both GA4 Event Tags will need a GA4 Configuration tag associated with them.
Go to Tags.
In the tag called GA4 – Event – Telephone Enquiry, amend the Configuration Tag and the Measurement ID to match your other Google Analytics 4 tags. Do this again for the tag called GA4 – Event – Email Enquiry.
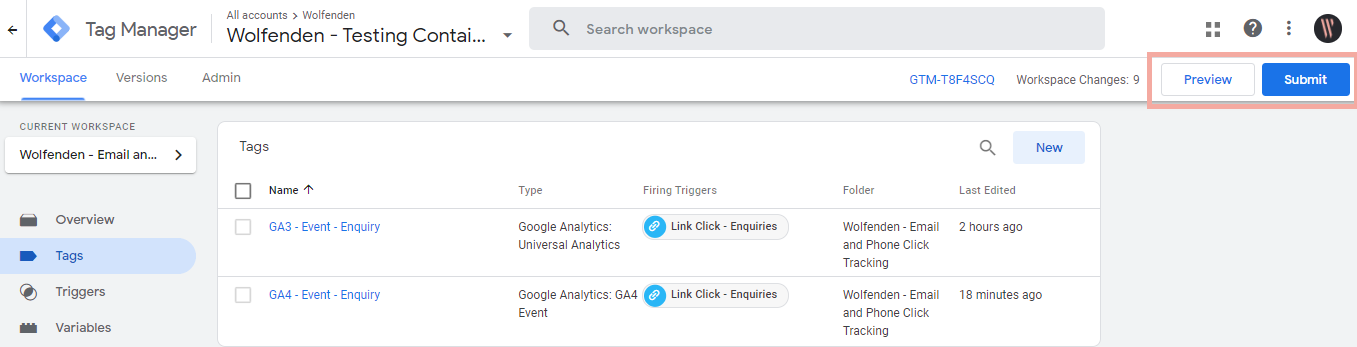
Test the new tags using the preview mode and publish your container (buttons in the top right).
Method 2 – Step-by-step guide
If you’re interested in creating this by yourself or customising it you can follow the steps below.
Step 1 – Enable Click URL as a Built-In Variable
We need to be able to track which links are clicked on and categorised them based on their URLs. For this we need to use “Click URL” as a variable.
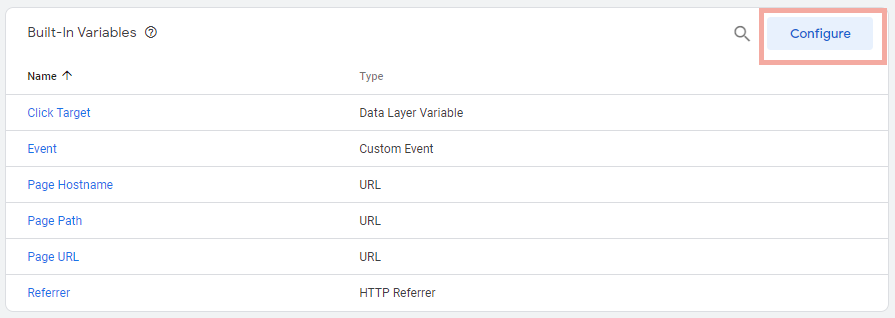
Go to Variables and click “Configure” next to Built-In Variables.
Scroll down to “Clicks” and tick the checkbox for . This will be used to determine what URL was clicked on and can be used in other variables to determine if it’s a telephone or email URL.
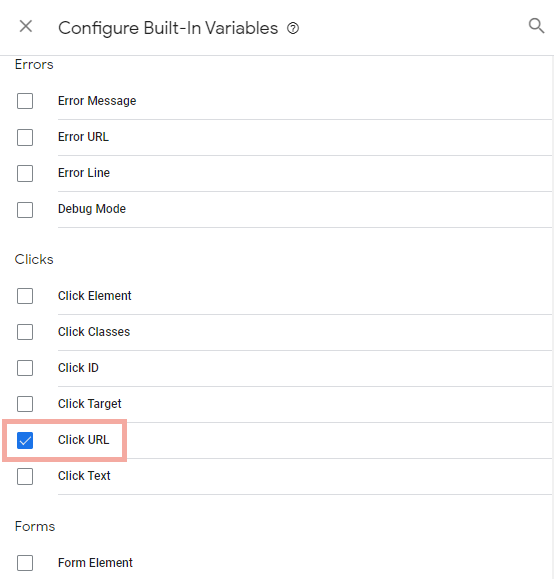
Click URL is now enabled as a variable to be used.
Step 2 – Custom JavaScript Variable to extract the e-mail or telephone number (Optional)
This is an optional step if you want to capture which email address or phone number was clicked on. If you only have one phone number and one email address on site you can skip this step.
Go to Variables and create a new variable (variable type: Custom JavaScript) and copy and paste the code below, and then save.
Custom JavaScript:
function() {

  var click_url = {{Click URL}};
if (click_url.includes('mailto:')) {
return click_url.substring(7).split('?')[0];
} else if (click_url.includes('tel:')) {
return click_url.substring(4).trim().replace(/-/g, '');
} else {
return 'other';
};
}
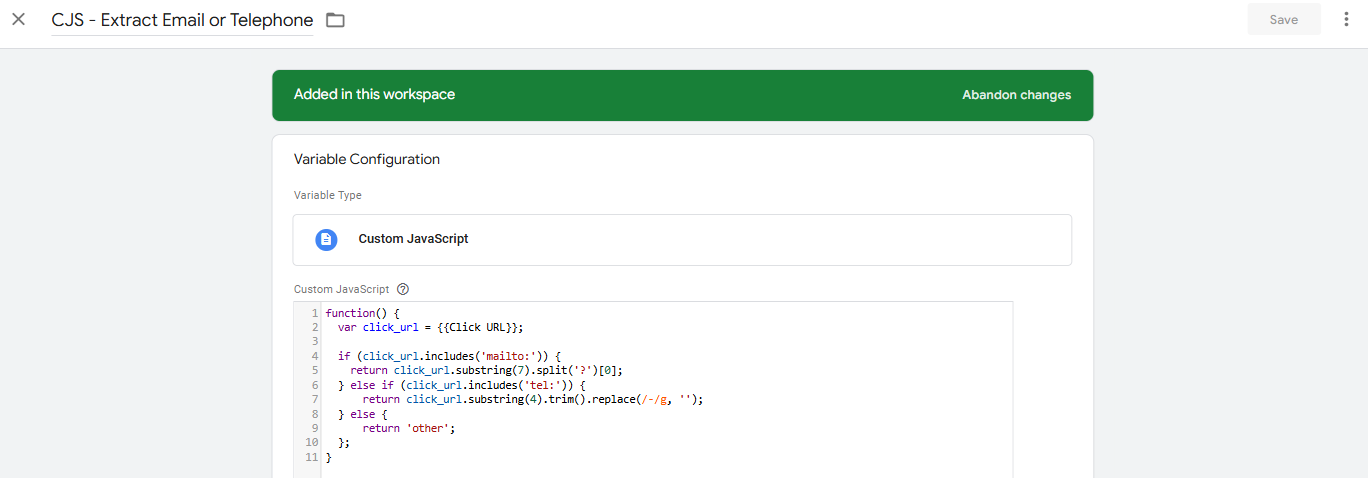
This reads the click URL to determine whether it’s an email or telephone click, it then splits the Click URL out into just the email address or telephone number clicked.
Save your variable as CJS – Extract Email or Telephone.
Step 3 – Enquiry click triggers
Next we need to create our triggers to determine when our enquiry tags will fire.
Go to Triggers and create your trigger for email clicks. Call it “Link Click – Email”.
Trigger Type: Click – Just Links
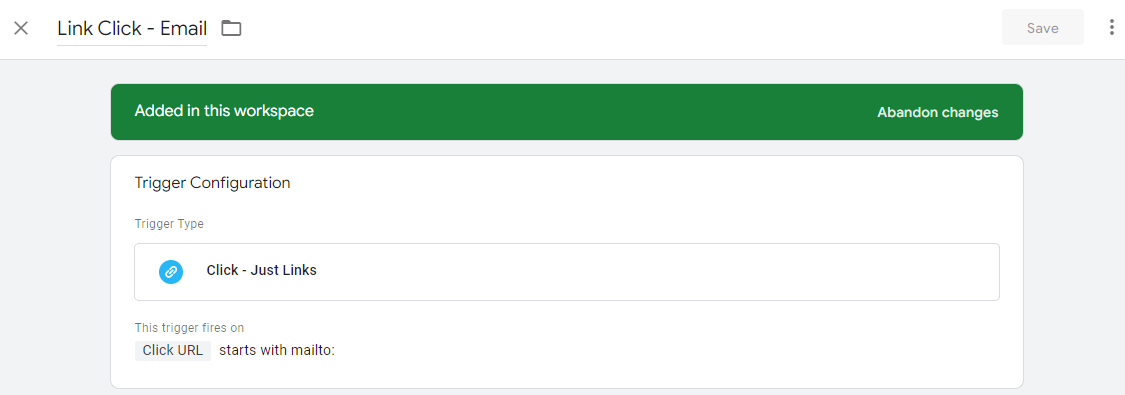
Save this trigger.
Duplicate this trigger to create a second trigger called Link Click – Telephone. The trigger type is the same but the conditions are Some Link Clicks – Click URL – starts with – tel:.
Step 4 – Google Analytics 4 Event Tag
Go to Tags and create a new tag with the tag type: Google Analytics: GA4 Event.
When creating the tag, update the Measurement ID to reflect your own GA4 Measurement ID. Apply the additional parameters as below:
Tag Name: GA4 – Event – Email Enquiry
Event Name: email_enquiry
Event Parameters (Optional)
Parameter Name: enquiry_details
Value: {{CJS – Extract Email or Telephone}}
Trigger: Link Click – Email
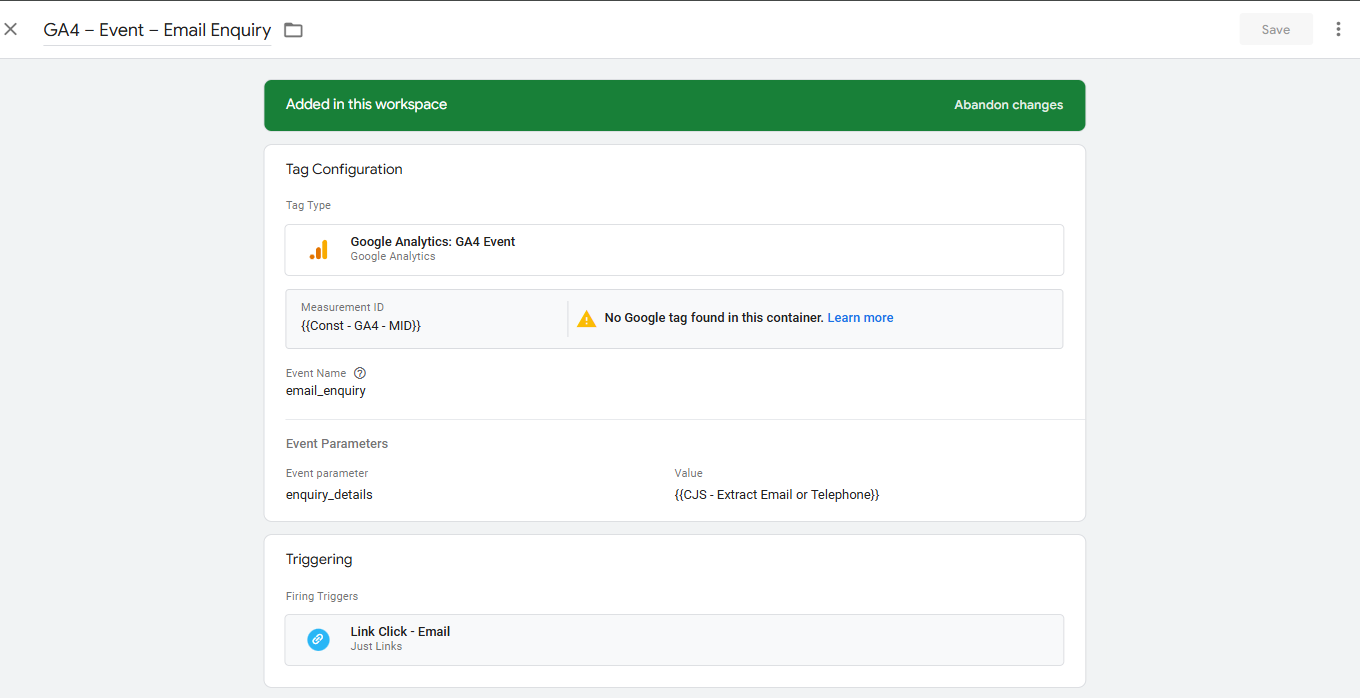
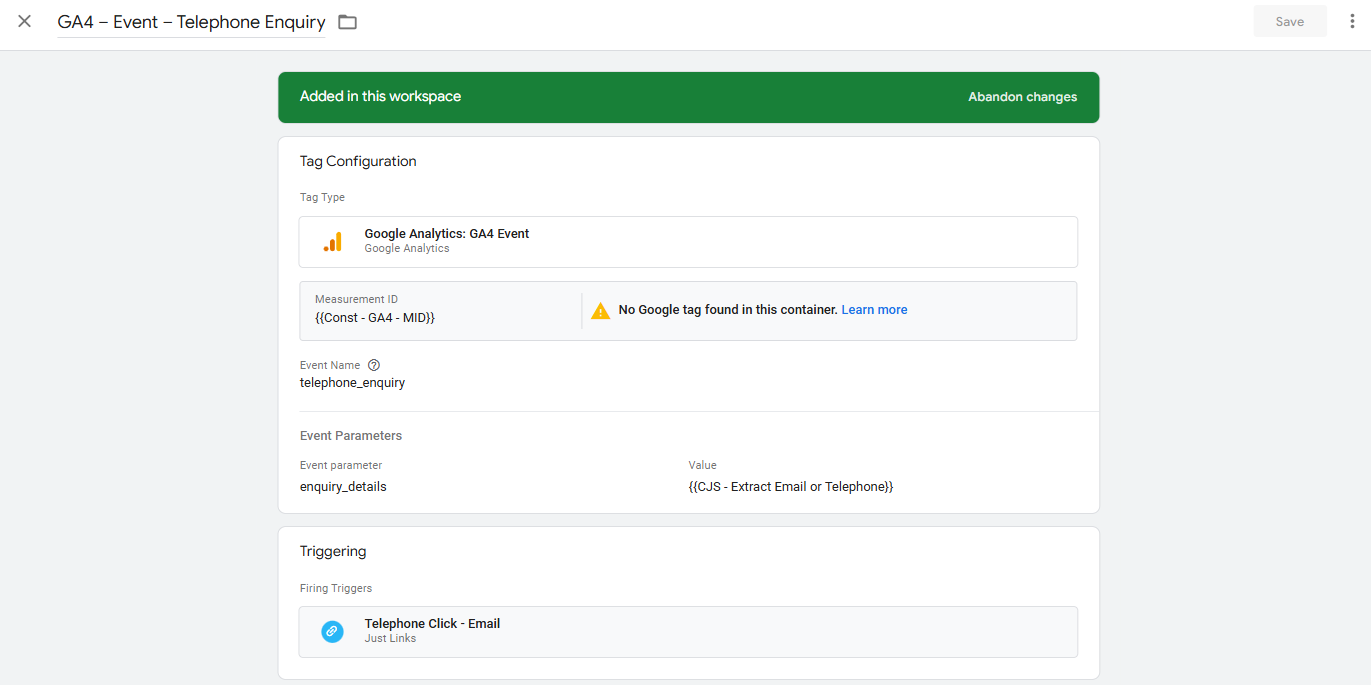
Save your tag, and then duplicate it for Telephone tracking. It should look like the following:
Tag Name: GA4 – Event – Telephone Enquiry
Event Name: telephone_enquiry
Event Parameters (Optional)
Parameter Name: enquiry_details
Value: {{CJS – Extract Email or Telephone}}
Trigger: Link Click – Telephone
Save both of these tags.
Step 5 – Preview and Publish container
This can be accessed using the “Preview” and “Submit” buttons in the top right of your Google Tag Manager container. You should test this by clicking email addresses and telephone numbers on your site, and ensuring the desired result comes back. As well as this – try clicking other links to ensure it does not over fire.
Part 3: Enquiry Tracking: Google Analytics 4 Conversion and Custom Dimension Configuration
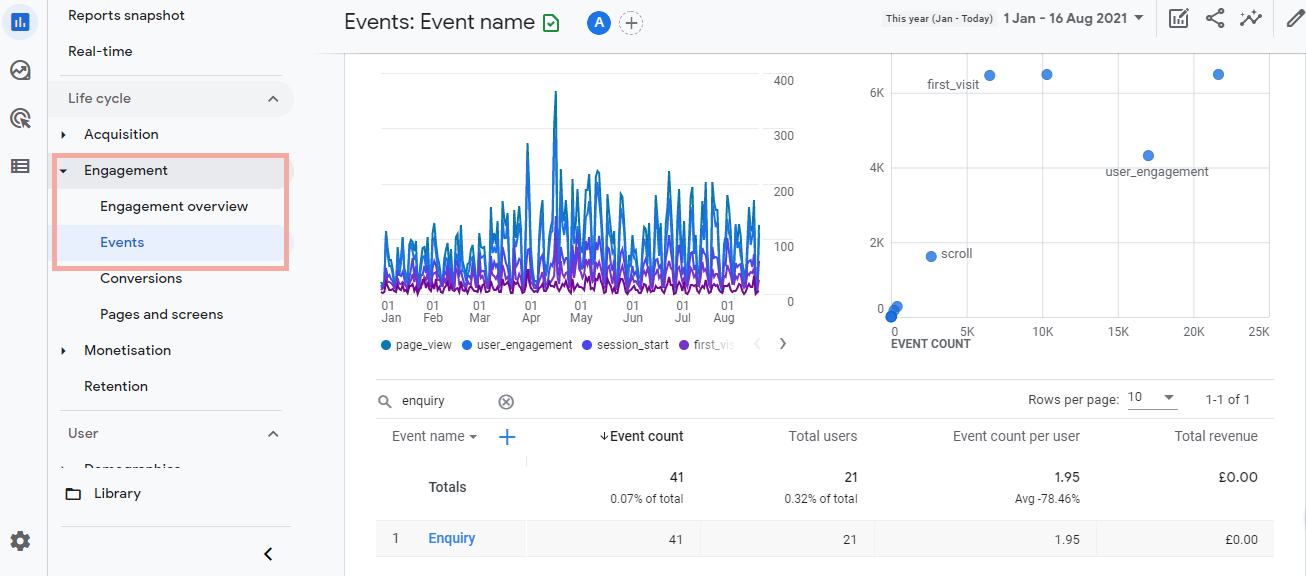
With the tags as they are, the events will be captured in the Engagement > Events report inside GA4, but the Custom Pararmeter you captured (enquiry_details) are not being recorded, and the events are not being captured as a goal.
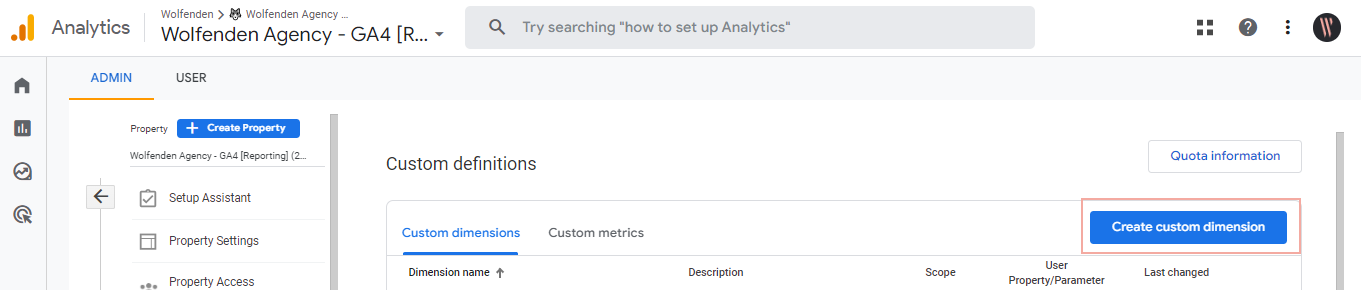
Go to Admin (the cog symbol in the lower left) and select Custom dimensions from the “Property” column.
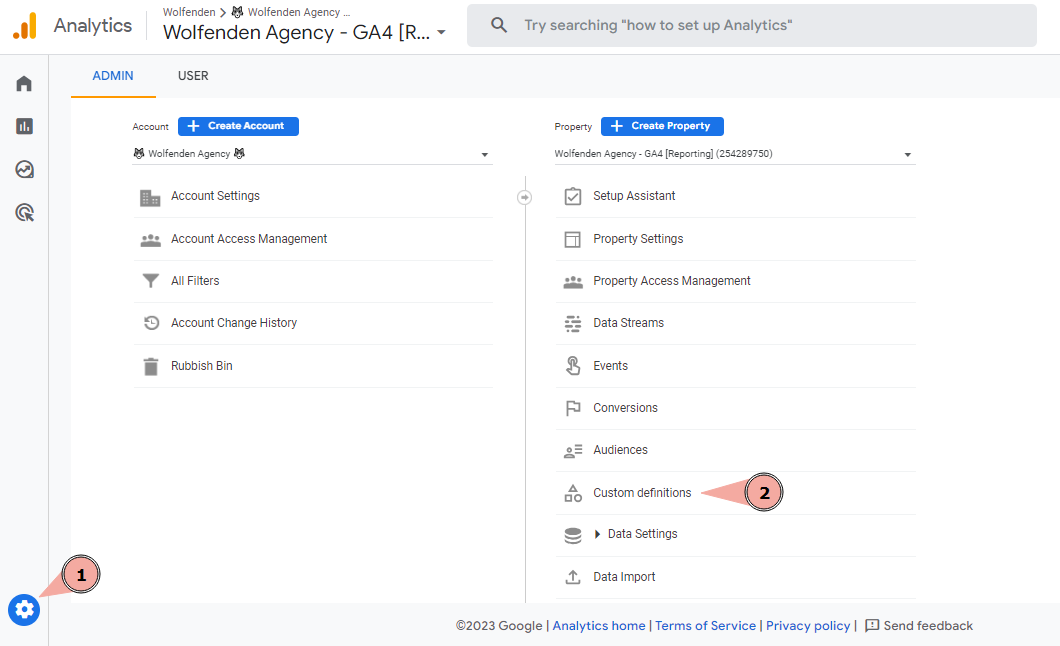
Click Create custom dimension to add the enquiry_details custom parameter.
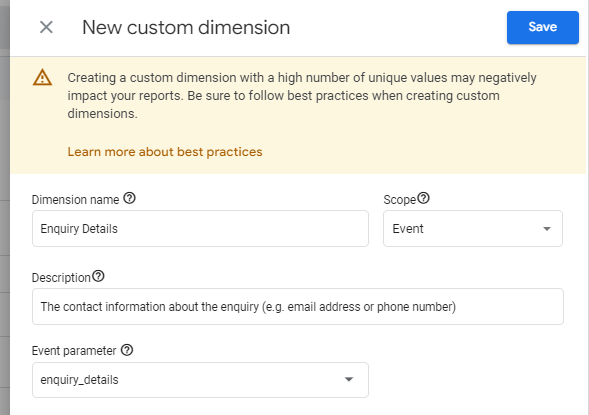
Add the following requirements to the custom dimension and press “save”.
| Dimension Name | Scope | Description | Event parameter |
| Enquiry Details | Event | The contact information about the enquiry (e.g. email address or phone number) | enquiry_details |
Once this is saved, the additional information about the telephone numbers and email addresses will be recorded and ready to report on inside GA4.
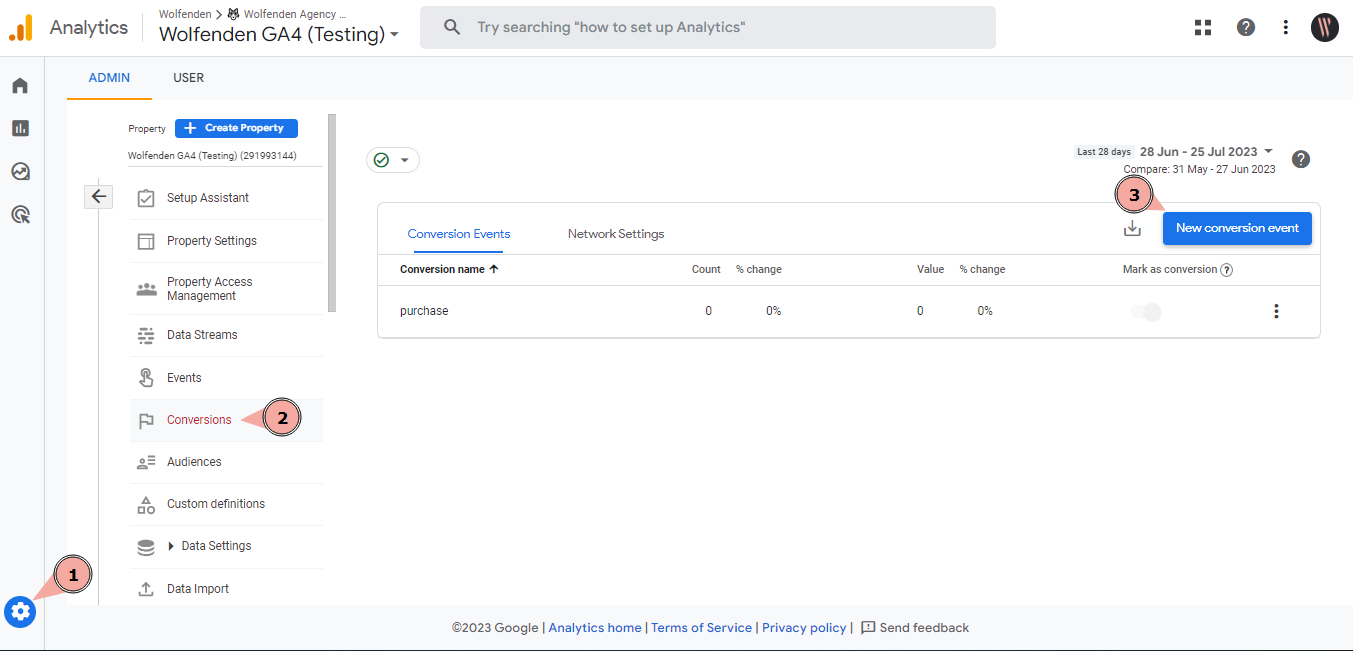
To define an event as a conversion, go to Adminand select Conversions. Then select New Conversion Event.
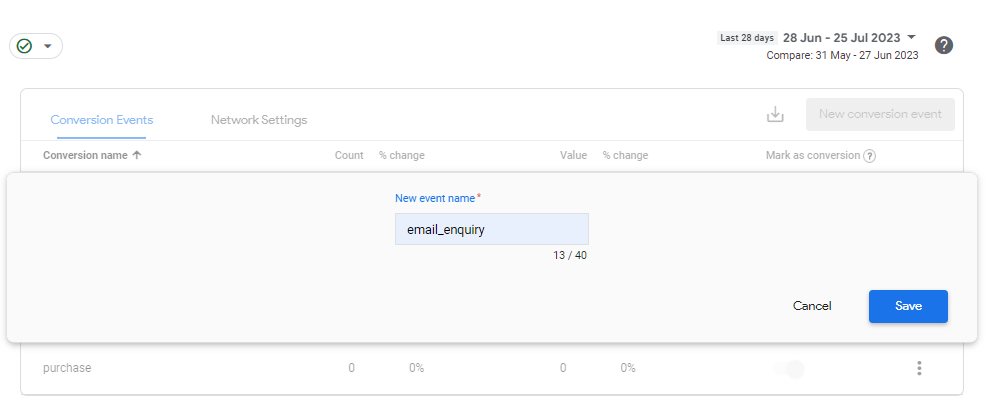
Add “email_enquiry” and save. Report the process for “telephone_enquiry”. These events are now ready to track as conversion events.
All done!
With this, you are now collecting valuable data about e-mail and telephone clicks in Google Analytics. Data may take up to 24-hours to be displayed.
If you have any questions about this or any other Google Analytics and Tag Manager tracking, please get in touch for some advice.
Latest Insights From The Team.
Explore our team’s latest thoughts and actionable advice from our blog to support your digital marketing strategies.